How to update from Windows 10 to Windows 11 with old CPU and old TPM.
With Windows 11 Microsoft raised the bar of system requirements for CPU and TPM. TPM 2.0 is required, as well as at least a 8th generation of Intel CPUs. This leaves a lot of older computers without an option to upgrade to Windows 11 officially, which are still ready and good to run for another couple of years.
OK you can switch to Linux, but often this is not an option, if you have software that is only available for Windows.
A little warning
But there is hope, the free tool “Flyby11” allows you to upgrade Windows on older machines. A little warning upfront, while this currently works, there is no guarantee for the future. Microsoft might decide, at any point, to no longer support older machines, either by accident or by purpose. While I suspect that Windows would not stop working, there might be issues with updates in the future.
That being said, this is a chance that one could take for now. In the best case, an older computer might run for another few years and does not get electronic waste right now.
Video tutorial
Upgrade with Flyby11
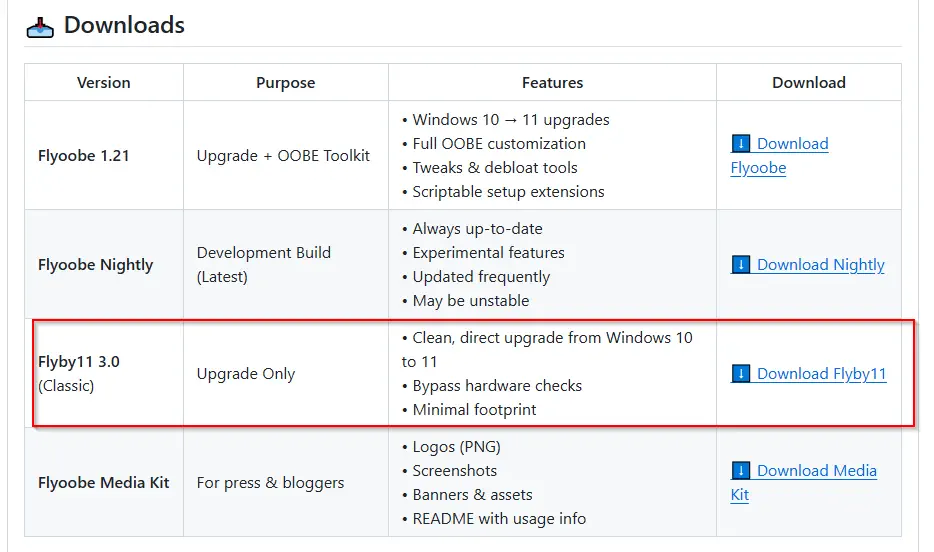
OK, this out of the, let’s get started. Before starting, a backup is recommended. First, let’s download “Flyby11“:
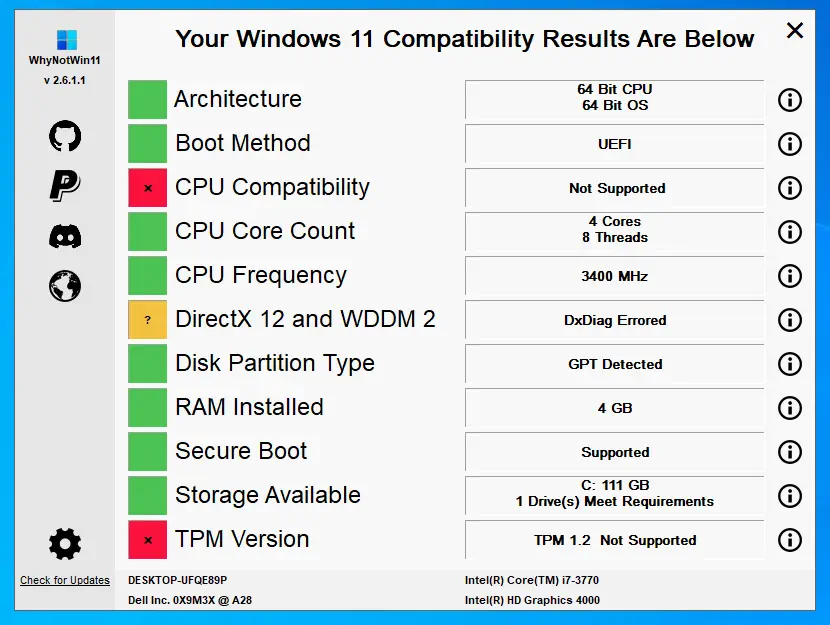
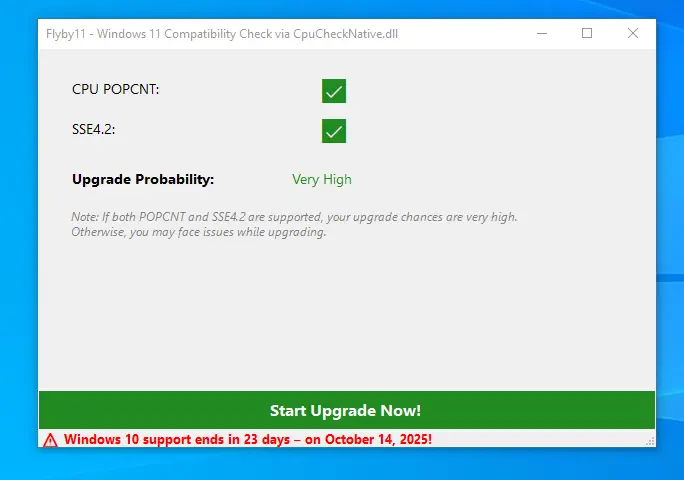
Extract the ZIP file and start the tool. A check is performed which indicates if the update is going to be successful. If it is not green, that your computer is really updated and an update might go wrong. In my case I have 3th generation i7 processor, which is quite old, but it supports the CPU features required.
Download Windows ISO file
In the next screen, we can choose a download option for the Windows ISO file. You can either select one on the left side, or select a download option on the right-hand side.
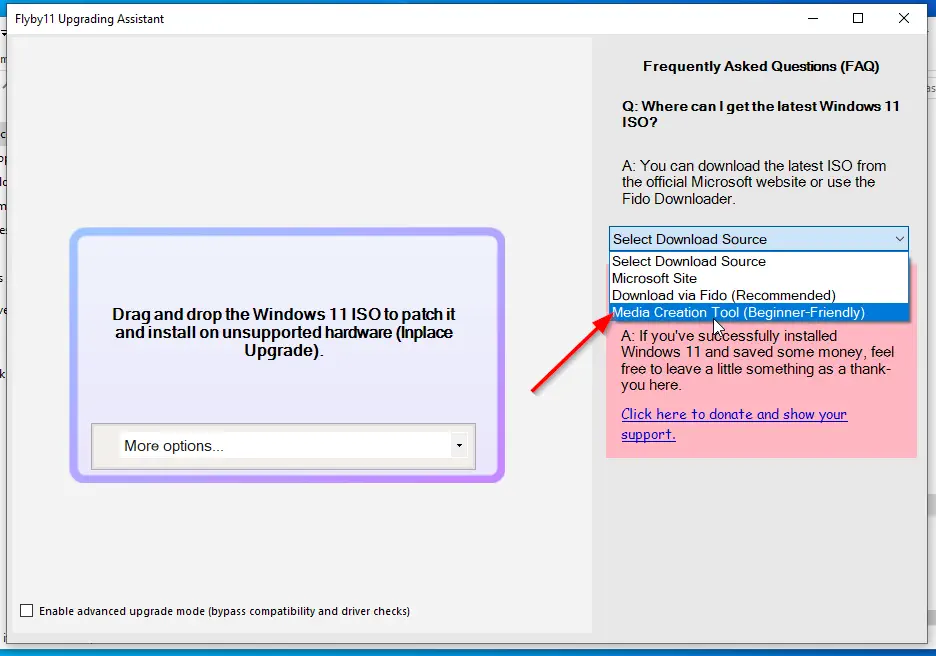
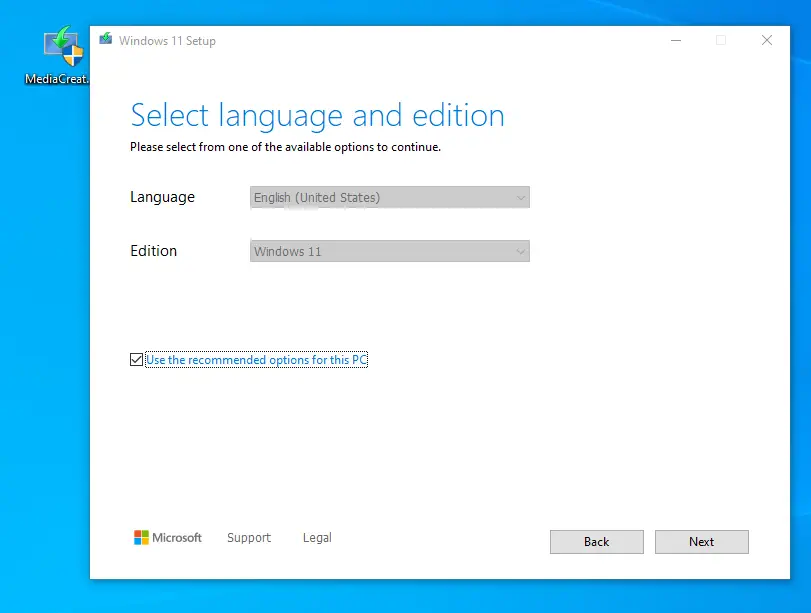
We will use the “Media Creation Tool” option, as this downloads the correct version for your computer. The tool is downloaded and started. We use the recommended settings for the PC.
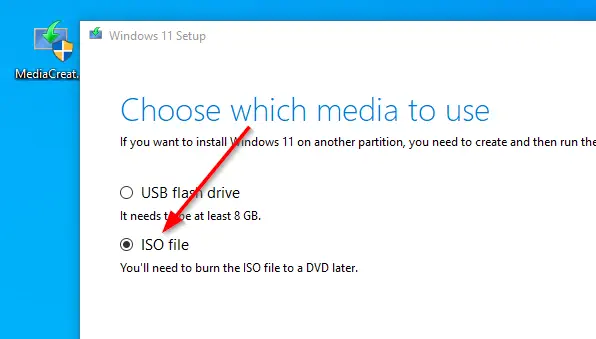
Select ISO file and select a download folder. You can select the Desktop folder and download/store it there.
Start the update to Windows 11
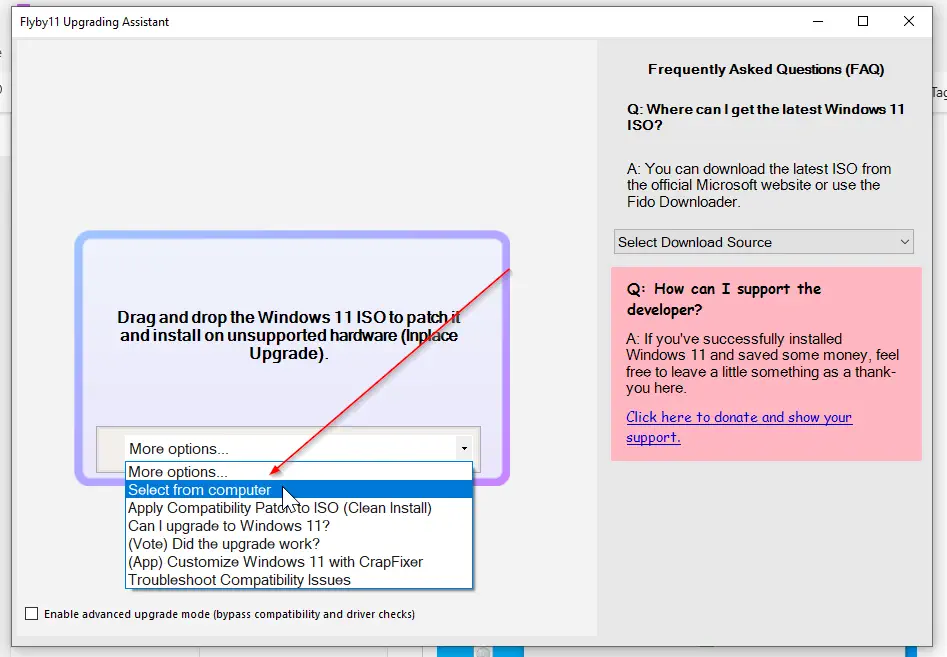
Once the ISO is downloaded, we select the file in the dropdown.
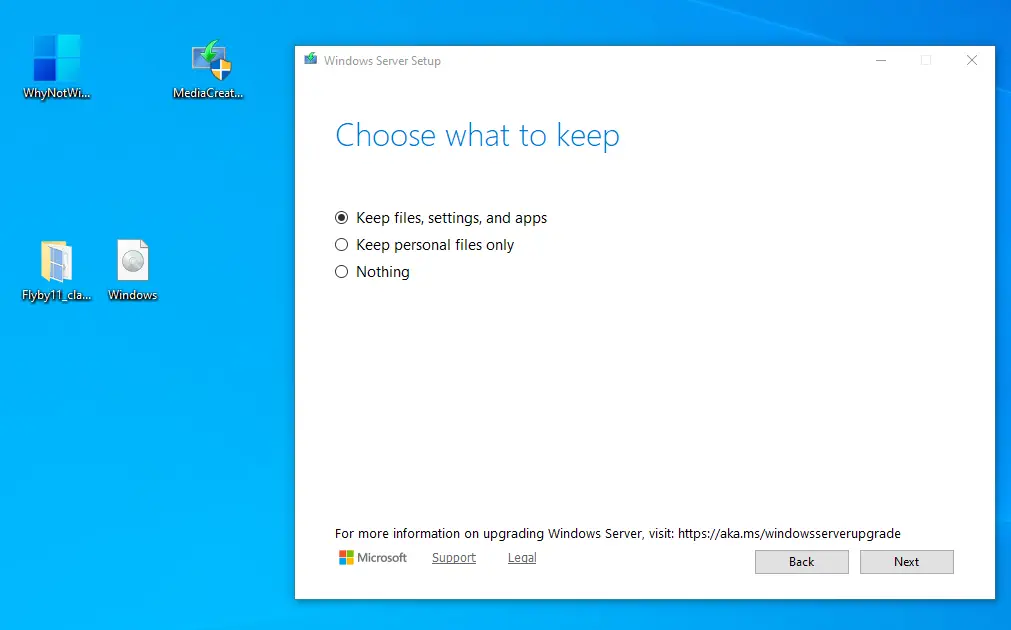
This still start the installer. It will tell you that Windows Server will be installed, but not worries. Accept license terms and select what you want to keep. For an upgrade we want to keep files, settings and application. Note, if the option to keep settings and apps is grayed out, you are using an incompatible ISO file. This should not happen if you have used the Media Creation Tool, but if you are using an existing ISO file this might happen.
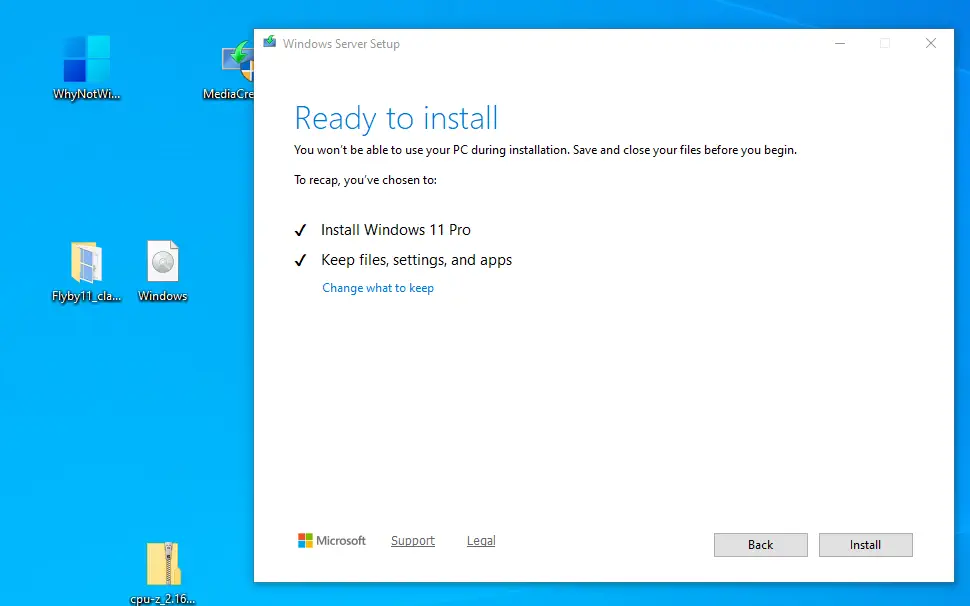
A final check and we are good to go.
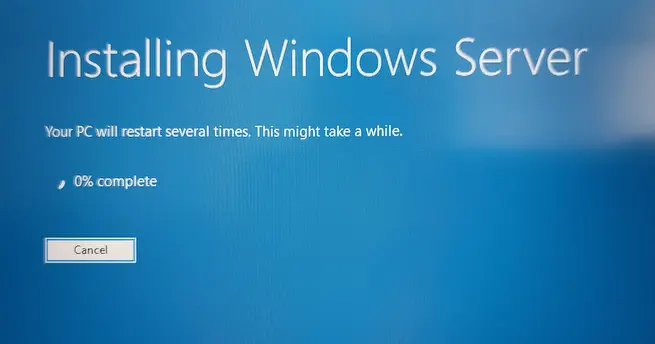
Windows 11 upgrade, restarts
Windows is now upgraded, this will take some time and there will be a few restarts.
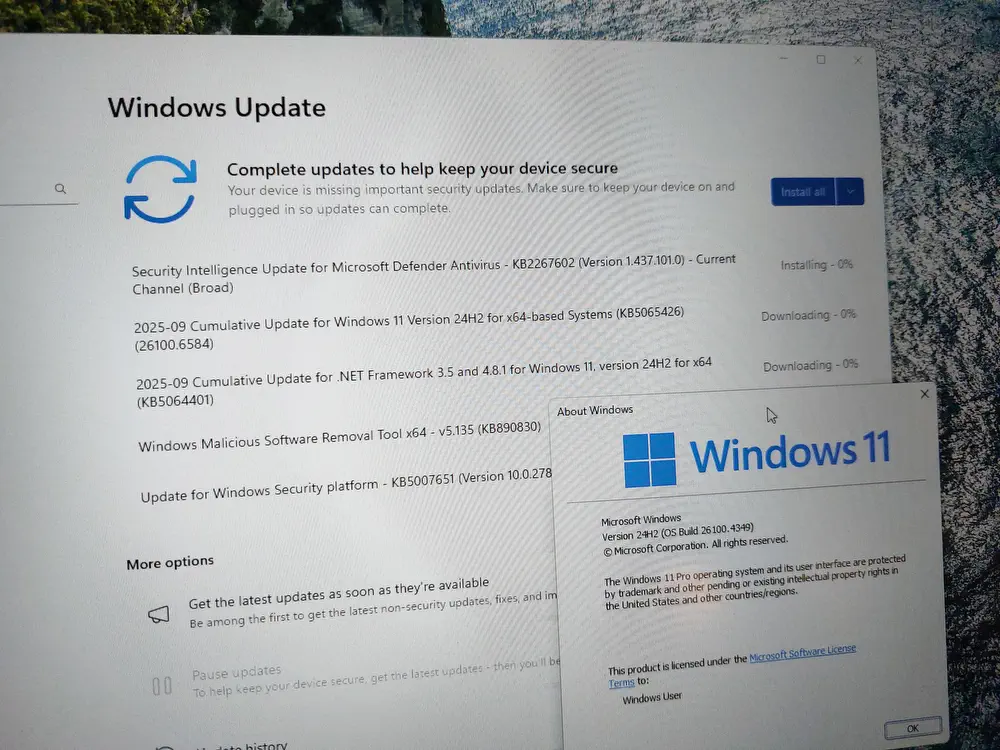
After that Windows 11 is installed. It is a good idea to test Windows update after upgrading.
Conclusion
As said before, there might be problems in the future, but for now this method works. Windows 11 performs quite a good, from a performance point of view, like Windows 10. My personal opinion is, that this might not be a solution for professionals and companies, it is a good solution for personal users which do not want to buy a new computer.
If something stops working in the future, like no more Windows updates, you can still buy a new computer then.
It it a little bit of a shame that Microsoft forces these requirements onto their users. I suppose a lot of still working computers will be wasted in the next few month.