Suspicion of viruses on the computer? Here a virus scan with a clean system offers itself!
If there is a suspicion that a computer has become infected with a virus, the hard disk should be scanned with a clean system and virus scanner. Otherwise, there is a possibility that a virus or Trojan horse may override the computer’s current antivirus protection.
This is where the use of Windows ToGo comes in handy. Using a Windows ISO file, we create a bootable Windows system on which we can install a virus scanner. We can then boot this system on the computer to be scanned and scan the hard disk or SSD for viruses.
Creation of the Windows ToGo USB stick
In the first step we want to create the Windows ToGo USB stick. We should do this on a clean computer, not the system we want to check. Whether Windows 11 or Windows 10 does not play the big role here. In the example we want to use Windows 10, because this runs on more computers.
The steps and functions basically differ only in details between Windows 10 and Windows 11.
After downloading the ISO file, we still download the free Software Rufus.
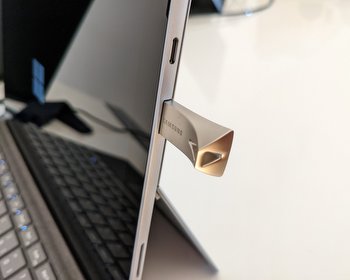
We start Rufus, plug in the USB stick and create the USB stick with the correct settings.

For the edition, the Pro version is a good choice, since it can be used with a local user account. For older computers, the GPT setting may have to be changed to MBR if there are problems booting.
Hit the start button to create the Windows ToGo USB drive. Note that all data will be deleted on the USB drive.
Booting from USB
Once the USB stick is created, we can plug it into the target computer and boot. Depending on the computer model, we need to go into the BIOS/UEFI and change the boot order. Most computers also support calling a boot menu. For this we have to press a certain key at startup, mostly it is F2, F10, F12 or simply Enter.

If everything has worked, Windows starts. When booting for the first time, we have to perform the “Windows installation” or setup. Here we can also already set up a WLAN connection. Carry out the steps for the installation. Provided we have selected the Pro version, we can set up a local user.
Then Windows ToGo will start. The advantage of the Windows environment is that we can also open Bitlocker encrypted drives without any problems. For this we need the recovery key.

If the drive of the computer is not displayed in the Explorer, a look in the disk management usually helps. If necessary, a drive letter must be assigned to the drive of our computer.
If this has worked, then two drives are displayed. The c:\ drive is our USB stick and our system disk.
Installing the virus scanner
Now we can install the antivirus software. We can choose from a lot of antivirus software solutions, in our example we use the free version of Avast.

We install the antivirus software normally in Windows ToGo. After the installation is complete, we can now scan the computer’s disk for viruses.

If there is an urgent suspicion of a virus infection and a scanner finds nothing, then it is recommended to uninstall this antivirus program and start a new scan with a second one.
Since we have access to the system drive, we can also read files from the system disk via the Windows ToGo system and back them up to another USB drive.