Disable Antimalware Service Executable in Windows 11 Home.
Windows Defender and real-time protection can also be disabled in the Home Edition. Basically, you should not do without virus protection, but if there are performance problems, this can be an option.
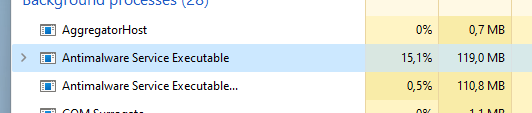
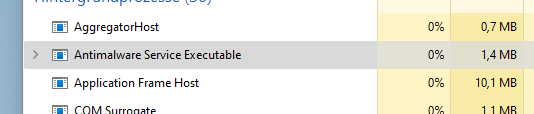
Windows Defender makes itself noticeable in the Task Manager as “Antimailware Service Executable”. The process runs in the background and monitors the system. The process uses a certain percentage of system performance for this.
Video tutorial
Disabling Windows Defender in Windows 11 Home
First, let’s access the settings. In Windows, go to:
- Settings
- Privacy and Security
- Windows Security
- Open Windows Security
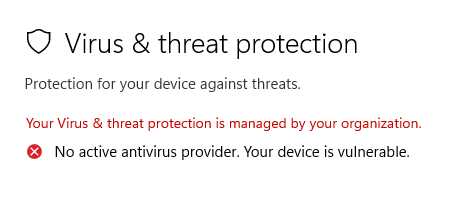
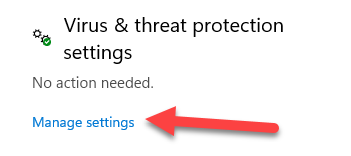
The Windows security center opens. Click on “Virus and thread protection”.
Here we find the item “Real-time protection”, if we only want to deactivate the real-time protection briefly for testing, we can do so here. However, the protection activates again automatically after a short time.
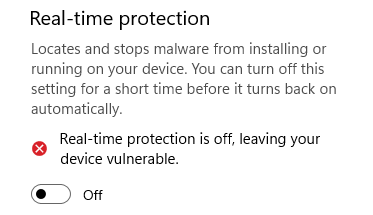
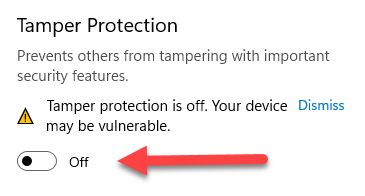
If we want to disable the real-time protection permanently, we have to take a few more steps. First, we need to disable the tamper protection. This is important because otherwise the changes we make afterwards will be undone.
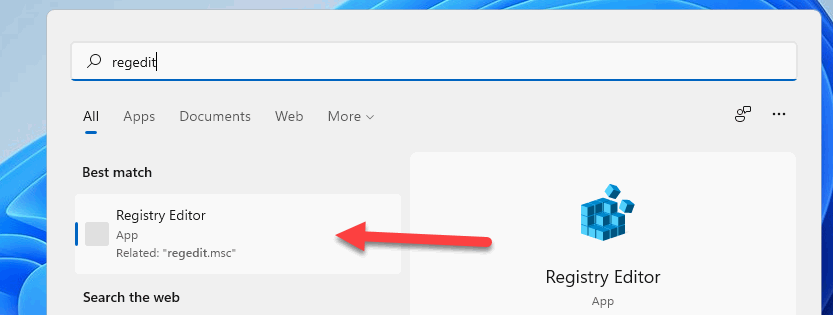
Now we open the registry editor.
We navigate to the following key:
HKEY_LOCAL_MACHINE\SOFTWARE\Policies\Microsoft\Windows Defender
Now we have to create a new DWORD value:
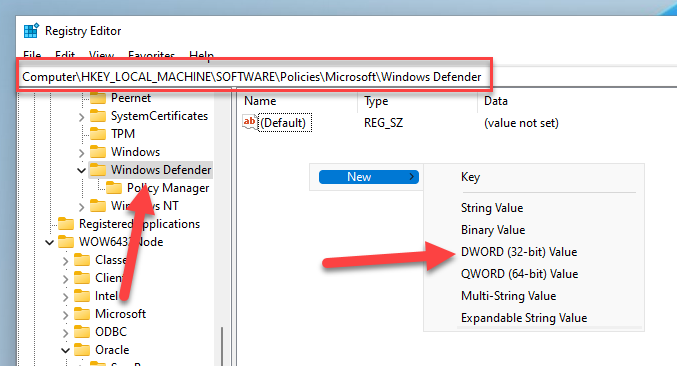
This one gets the following name:
DisableAntiSpyware
After creating, we double-click on the value and set “1” as the value.

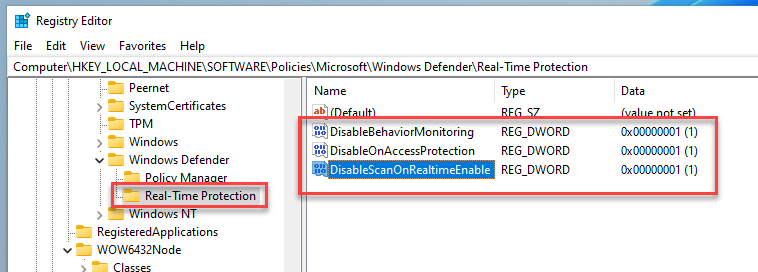
Then we need to add a new subkey to “Windows Defender”.

The key must be named “Real-Time Protection”. In that key we put three DWORD values, similar es before:
DisableBehaviorMonitoring
DisableOnAccessProtection
DisableScanOnRealtimeEnable
These are also set to “1”.
We then restart the computer. If it worked, “Antimalware Service Executable” will still be displayed, but should now have 0% system load, permanently. If this is not the case, it is best to check the registry entries again. We often had the case that the first key was gone after the restart, in this case create it again and restart the computer again.
If we look in the settings for virus protection in Windows, it should be displayed as disabled. To reactivate the virus protection, simply delete the created entries in the registry or set them to the value “0”.