The Print key on the keyboard is used by default to take screenshots. Until now, if you did not have any other screenshot tools installed, tapping the Print key would take a screenshot of the entire monitor and place it on the clipboard. This allowed the screenshot to be pasted into Paint or another graphics program for further editing. In my case, I still had the SnagIt installed for such screenshots, which responded directly to the Print key and opened.
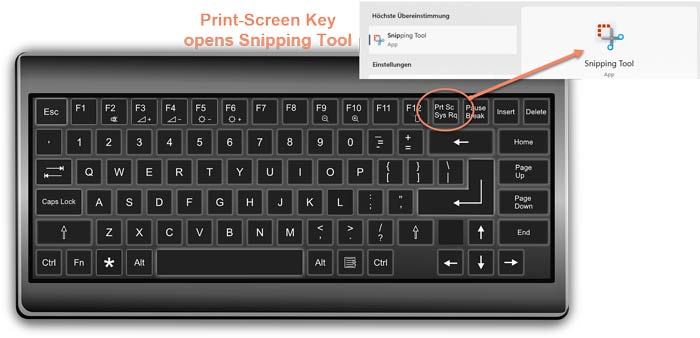
For some time now, however, Windows has been bugging me because this familiar behavior is no longer there. Since an update of Windows 11 (KB5026446), Windows’ own snipping tool opens automatically. This function hard overwrites the functionalities of any third-party software, such as Snagit, and the old behavior with direct storage of the monitor screenshot in the clipboard is also no longer given.
But all this fits in very well with the strategy that Windows is pursuing very noticeably to bind the user more and more closely to its own software products, which are often delivered on-board with Windows. Those who did not know the snipping tool yet will get to know it now at the latest and will probably use it primarily to look up third-party providers of such screenshot software.
Disabling under Accessibility Settings
Fortunately, there is still a way to disable this behavior. The necessary settings for this have been hidden in the Windows settings under “Accessibility“. What this has to do with accessibility is anyone’s guess. On the other hand, one can be glad that there is a setting for it at all and that one does not have to go straight to the registry. To stop this unspeakable behavior, proceed as follows:
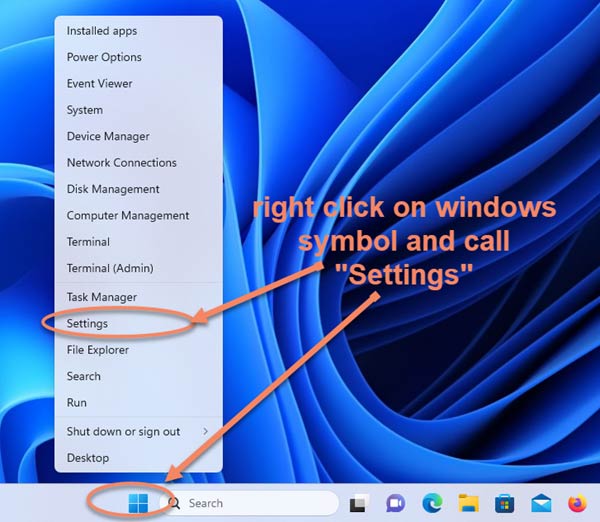
Step 1: Call up Windows settings
The first step is to call up the Windows settings. The quickest way to do this is to right-click with the mouse on the Window icon in the taskbar and then select “Settings“.
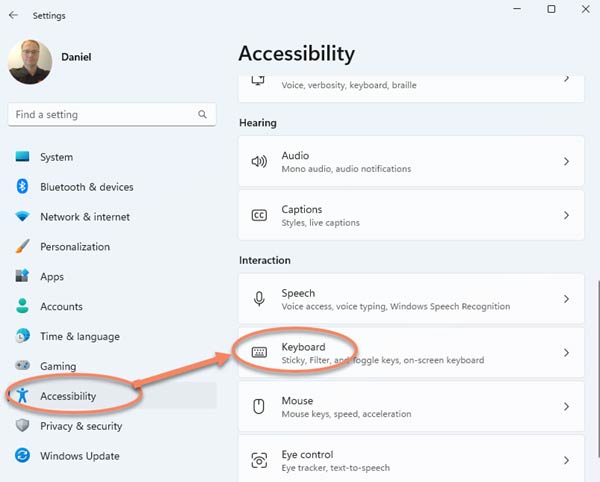
Step 2: Select accessibility/keyboard
Secondly, navigate to the menu “Accessibility” and click on the entry “Keyboard“.
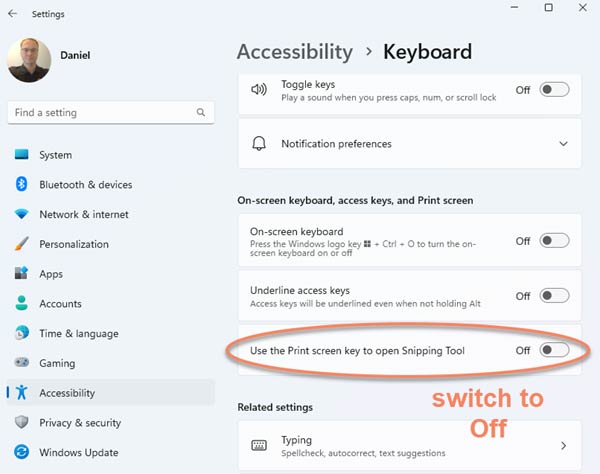
Step 3: Turn off the button to open Snipping Tool
In the third step, you can then scroll down. There you will find the setting
Use the Print screen key to open Snipping Tool
There, set the switch once to “Off”.
Finally, as is often the case, it is best to restart the PC. This is especially important with third-party software for screenshots, as the desired behavior will only be restored after the restart.