Windows 11 comes with a fresh new look and certainly has a few new features under the hood. However, Microsoft has also rationalized a few very useful features for some users.
So currently the drag & drop to the taskbar does not work.
Previously, in Windows 10, you could grab a file, for example an image, with the left mouse button and drag it to the application, for example Outlook, to paste the file into an email. Then the application opened and you could drop or paste the grabbed files into the respective application, if the application was suitable for it. Unfortunately, the practical drag&drop no longer works under Windows 11. If you drag the file onto an app in the taskbar, a small red prohibition symbol appears, as shown in the following image.

But there is hope. According to relevant reports, Microsoft will probably reintroduce this feature with a future update due to many user complaints. Until then, you will have to make do with alternative procedures or workarounds.
Implement Drag&Drop on Taskbar in Windows 11
Customize registry for drag and drop
One variant to restore the drag & drop and the usual functionalities of the taskbar for Win11 is to adjust the settings via the registry:
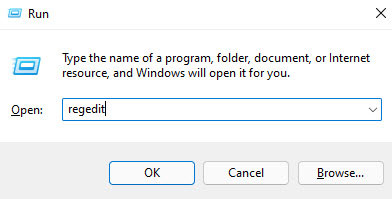
- First you open the registry editor via the “Run” dialog. To do this, press the key combination “Win+R” and then type “regedit“.

Win+R and then type in regedit in Run - The next step is to open the registry editor. In it, navigate to the following entry either in the left tree menu or simply copy the path:
HKEY_LOCAL_MACHINE\SOFTWARE\Microsoft\Windows\CurrentVersion\Shell\Update\Packages
Navigate registry editor and insert new value - Then insert a new key via right click “New” ➤ “DWORD (32bit) Value “.
- The key is given the name “UndockingDisabled“
- Now you have to adjust the value. To do this, right-click on the key and select “Change…“.

Right click and “Modify…” select - Set the value to “1!

UndockingDisabled Set value to 1 - After that click OK and close the registry.
- Finally restart Windows 11
After that the Windows taskbar appears again in the old format with the known functionalities.
[Update 11.12.2021]
For me the registry change brings some undesirable side effects:
- Windows starts much slower when booting
- the Windows start menu cannot be opened (neither over the mouse nor over the Win key)
- taskbar icons are arranged similarly to Win10 link, but no time is displayed
Use of ThirdParty-Products
There are a few software products that restore the old Windows 10 functionality.
One product is “StartIsBack” which Andy already reported about for problems with moving the taskbar to top, left or right.
Another tool to fix the drag&drop to the taskbar is Windows11DragAndDropToTaskbarFix, which is also available on GitHub including code.
In the meantime also on microsoft website is a free tool called “Drag and Drop Toolbar for Windows 11” developed from V3TApps. But it inserts a extra toolbar on the top of the screen.
But not everyone likes to have to install additional tools because of this little annoying thing. Therefore, alternatives can be used to drag files to Taskbar.
Alternative procedures
These approaches do not quite fulfill the desired functionality, but rather represent alternatives to dragging and dropping onto the taskbar. The goal is the same, only the way is different.
Use shortcut Alt + Shift
One variant is to use the key combination Alt + Shift. This bypasses the taskbar. The prerequisite is that the target application is already open.
- grab the file(s) with the left mouse button as usual
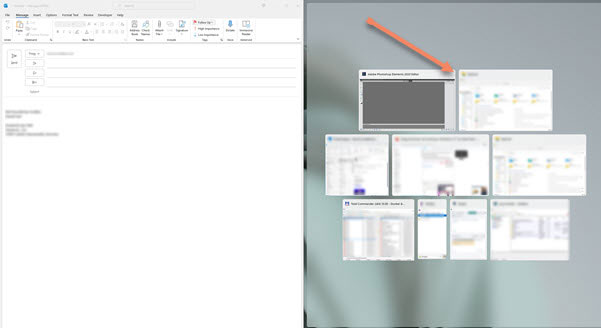
- Press Alt + Shift; an overview of all open programs is opened
- press Shift repeatedly and select the target program
- release left mouse button (drop)
Use Split Screen
You can also use the “Split Screen” function to drag files from one application to another. This function allows you to position two or more applications side by side on the screen at the same time.
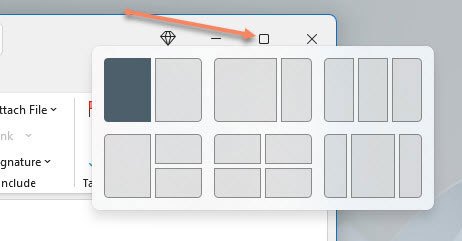
To do this, move the mouse pointer to the maximize icon and stay there briefly until a selection window appears. There you can select the desired type of screen division.

You can also use the Win + Arrow (right/left) key combinations.
Next, select the second application.

After that you have both applications side by side on one screen and you can drag and drop or copy between the two applications as you like.

