Install Windows 11 in VHDX file, dual boot next to first Windows.
Windows can be installed multiple times on a hard disk without any problems. The standard variant is done by partitioning the hard disk. Each Windows gets its own partition and a boot menu appears at startup. Here we select the Windows to be started.
Virtual hard disk instead of partitioning
Alternatively, it is possible to install Windows into a virtual hard disk, into a VHDX file. The advantage is that the hard disk does not have to be partitioned. The second Windows ends up in a file. Thus, the second Windows can not only be installed flexibly, but can also be disposed of again without any problems.
The VHDX file can also be created flexibly in size, so that only as much storage space as necessary is occupied. In operation, the second Windows behaves like a normally installed Windows.
In the example we use Windows 11, in practice this also works with Windows 10. Of course, Windows 11 can also be installed next to Windows 10 and vice versa.
As always, make a backup before interfering with the system in any way. But now let’s go!
Video
Download Windows 11 ISO – Creating the installation stick
For the installation, we need a Windows 11 installation stick. To do this, we download the Windows ISO file, which we then transfer to the USB stick using programs such as Rufus.
Alternatively, we can use the Windows Media Creation Tool from Microsoft, which is also available on the download page.

Create VHDX
After downloading and creating the USB stick, we create the virtual hard disk for the installation in our Windows. To do this, we call the Disk Management.

Here, we now create a new virtual hard disk.

We select the location. We will need this again later during the installation. We also specify the size and select VHDX as the type. Select also the recommended option “Dynamically expandable”. In this case, the file will automatically become larger if the storage space is needed. The size specification here is then the maximum size.

After the creation, we still initialize the disk.

Start Windows installation
Now we start the installation. For this, we restart the computer. Then we have to call the boot menu and boot from the USB stick. The procedure here is different depending on the manufacturer. Usually a certain key like ESC, F2, F10 or F12 has to be pressed. Alternatively, change the boot order in the BIOS/UEFI so that the USB stick is set as the primary boot medium.

Mount VHDX file
The Windows installation should now start. Before we start the installation, we press “SHIFT + F10”.

This will open a command line. Here we can check if our system drive already has a drive letter assigned

If not, you can set a drive letter using the following commands:

Once you have done that, start “diskpart”, if it’s not already running.
We have to attach the virtual hard disk using these two commands:
select vdisk file="c:\windows11.vhdx"
attach vdisk

The “list disk” command should now show the virtual hard disk in the list.

We “exit” diskpart, type “exit” again to leave the command prompt.
Install Windows
Now we start the installation. We enter the key, if available, select the Windows edition and confirm the license conditions. For the installation type, we select “Customized”.

When asked where to install Windows, our virtual hard disk should appear here. We select this one. This should appear as unallocated space.

With “Next” Windows will now be installed.
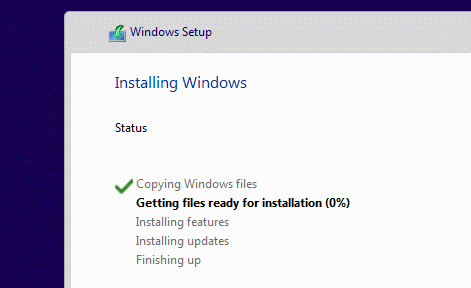
Dual boot
After some time, a restart now takes place.

When restarting, the new boot menu now appears. Here, we can now select which Windows should be started. We recognize the new Windows by the higher number at volume label. Boot order, name etc. can be edited later.
When Windows is started for the first time, the installation is continued. The steps correspond to the normal installation of Windows, therefore we save the steps at this point.

Just follow all the steps. At the end, the new Windows will start.

Adjust boot menu, remove installation
The new boot menu now appears every time the computer is restarted. The boot menu can be edited with “EasyBCD”:
With the software you can, for example, set the order, the waiting time at start-up or even the names. The second Windows can also be easily removed again. To do this, we simply remove the entry from the boot menu.
Afterwards, we only need to delete the VHDX file.
Conclusion
Installing a second Windows as a VHDX file has advantages. Essentially, we save ourselves a repartitioning of the hard disk here. Especially with a Windows that we only want to use for a limited time, this saves a lot of time and trouble.
By the way, other Windows can also be operated in parallel in this way.
I hope you can answer some questions:
windows11.vhdx shows 71 303 368 bytes
It is quite confusing, initially the VHDX is created as 128gb. Then it shows up as 71 303 368 bytes. Then it changes to 255gb and back to 128 gb.
list disk…select volume 1…assign letter c (should I assign letter D? C drive is the original drive)
Hey! I think, that size behavior is totally normal. When you first create the VHDX file, it’s really small – just a few MB. It only grows as needed, up to the size you set (like 128 GB). So seeing it jump around a bit is expected and nothing to worry about. It’ll grow more as Windows installs and you use it.
As for the drive letter — I’d avoid using `C:` during setup, since your original Windows is already using it. Just pick something like `D:` or even skip assigning a letter altogether. The installer will later assign `C:` inside the new Windows anyway, so you don’t have to worry about that.